This guide will walk through the steps required to block devices on your network from accessing your ISP provided router. This guide will specifically walk through the steps required to block a guest LAN from accessing the user interface of the Virgin SuperHub cable modem/router but it can be tweaked to your own requirements.
Specific Virgin Media Notes:
Once Modem Mode is enabled on the Virgin SuperHub, the IP address that it’s accessible by changes to 192.168.100.1 which can still be accessed by anybody on your network.
1. Create IP Objects
The first step is to create the IP Objects for the IP range you wish to prevent accessing the ISP router, and the ISP router itself.
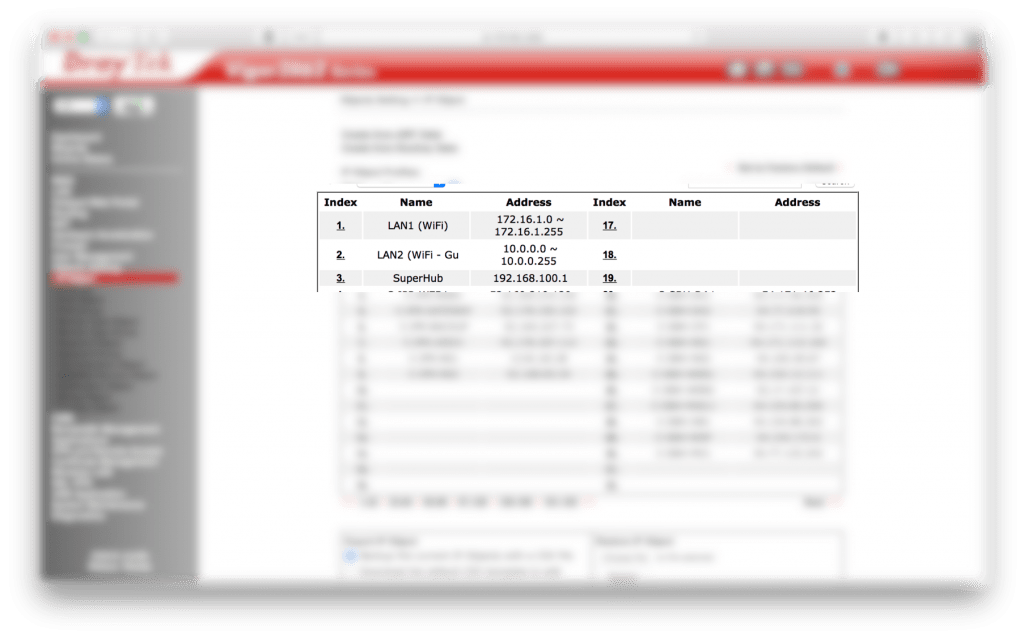
To do this, head to the IP Object page on your DrayTek router (Objects Settings > IP Object). Then, click the number next to a blank unused IP Object (if you’ve never added any before, you can use 1).
Then enter the details for your guest LAN. Mine are as follows:
Name: LAN2 (Guest)
Interface Any
Address Type: Range Address
Start IP Address: 10.0.0.0
End IP Address: 10.0.0.255
Then click OK

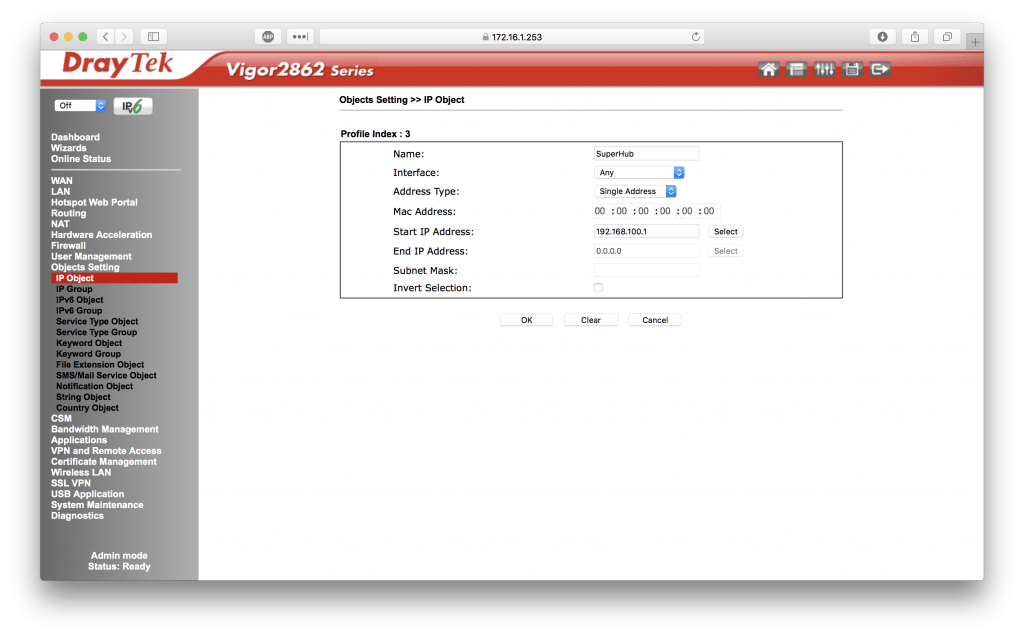
Next, create another IP Object (you would typically use the next available IP Object number for this) and enter the following details – tweak them for the details for the router you want to block access to but I will be using the details required to block the Virgin Media SuperHub.
Name: SuperHub
Interface: Any
Address Type: Single Address
Start IP Address: 192.168.100.1
Click OK.
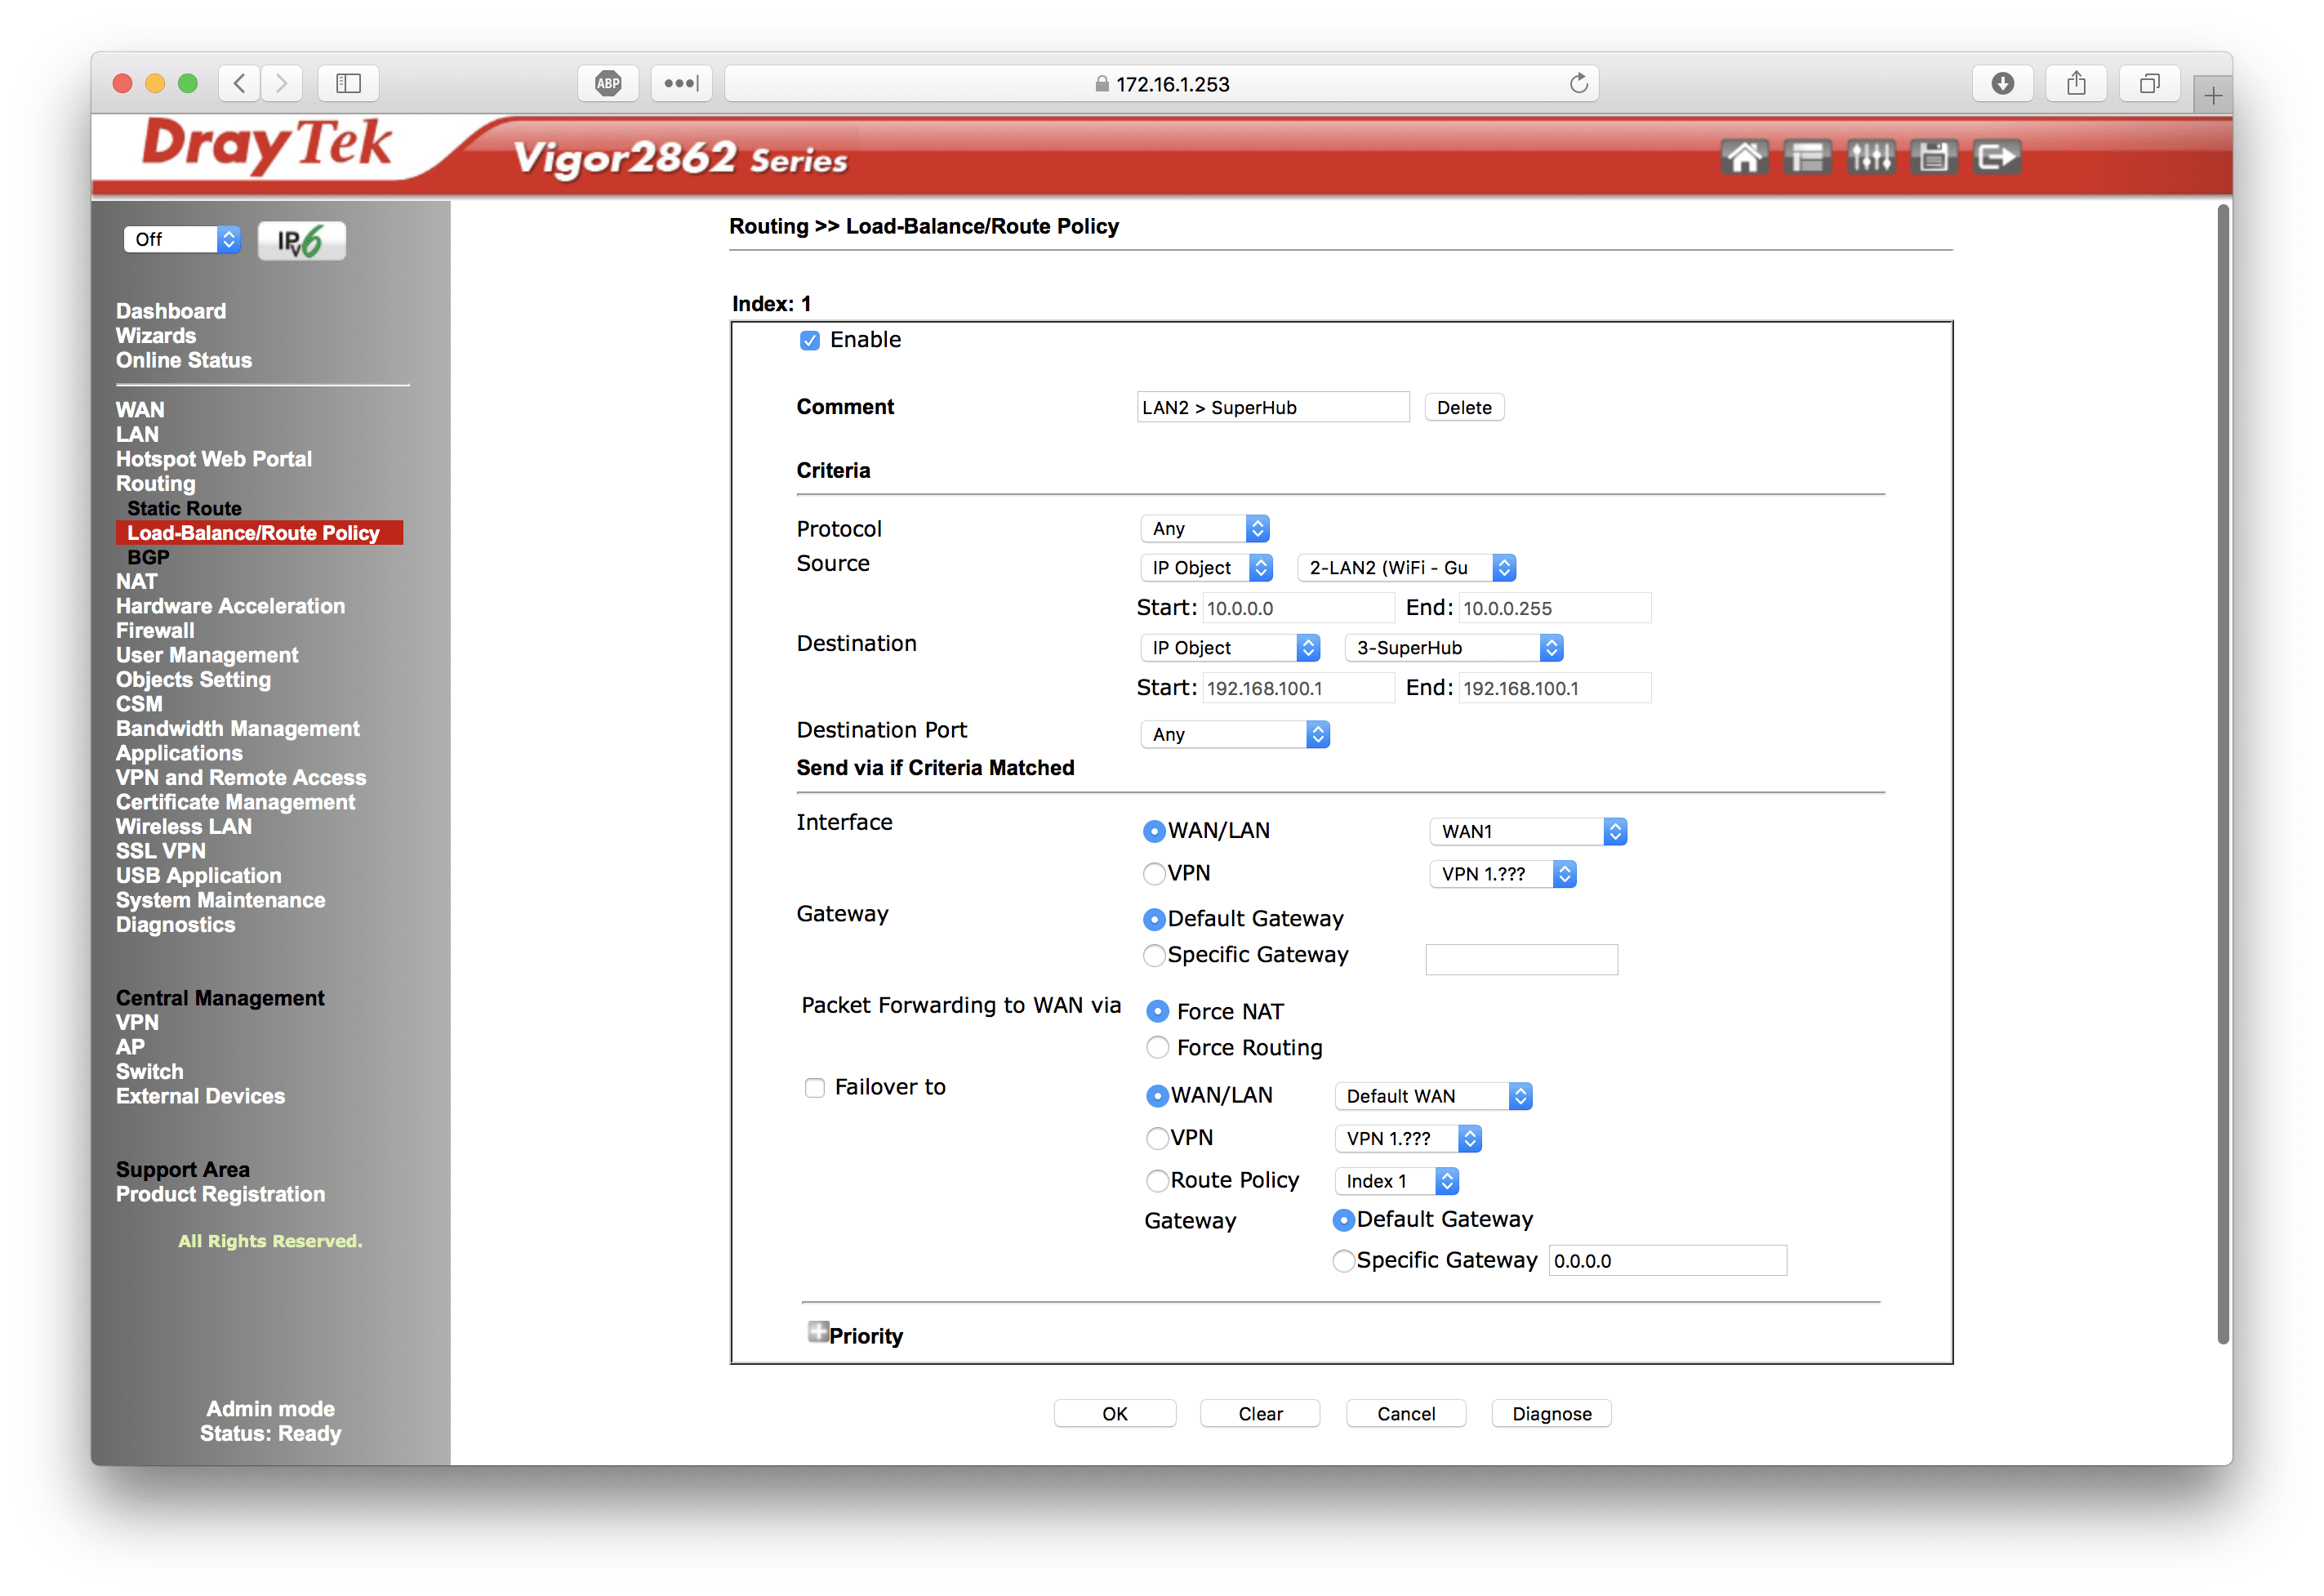
2. Create a Routing Policy
This next step is slightly odd. Attempting to block this via the DrayTek firewall doesn’t appear to work, so we are going to instead create a routing policy to route traffic from the IP range you wish to block access to the ISP modem/router out via a virtual WAN (wide area network) interface (in this case, WAN7). This means instead of the traffic being blocked per se, it is instead sent out via a different WAN interface that the ISP modem/router is not accessible on.
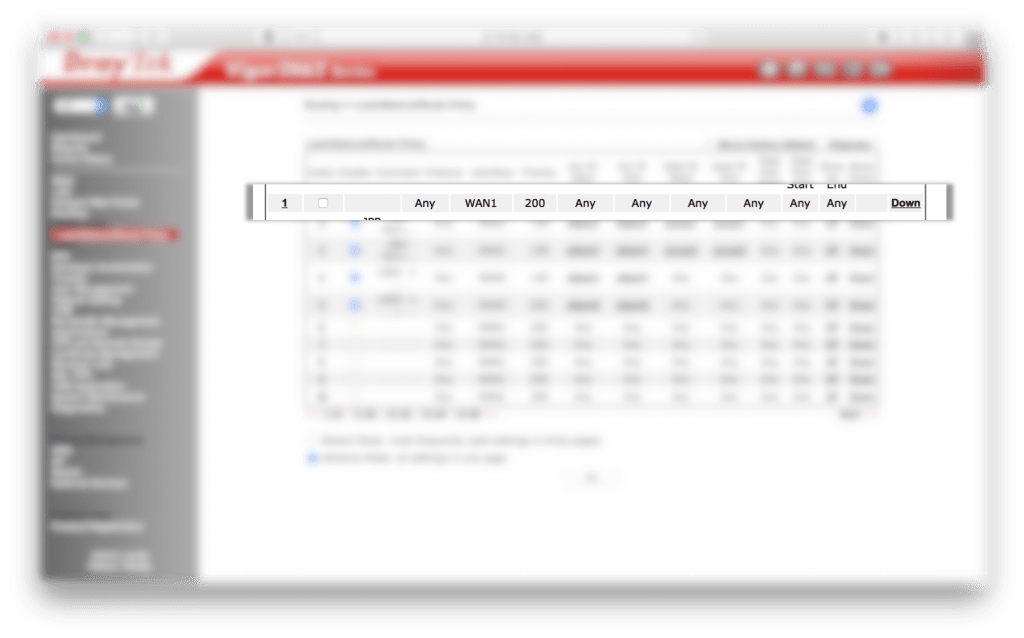
Head to Load-Balance/Route Policy (Routing > Load-Balance/Route Policy) and click the number next to the next available routing policy (in my case, 1).
Tick Enable and enter the following details (tweak for your own setup though):
Comment: LAN2 > SuperHub
Criteria:
Protocol: Any
Source: IP Object (and then select the IP Object for the LAN range you wish to restrict – in my case LAN2 (Guest))
Destination: IP Object (then select the IP Object for the router – in my case SuperHub)
Destination Port: Any
Send via if Criteria Matched:
Interface: WAN/LAN (and then select an unused WAN interface from the list, I picked WAN7).
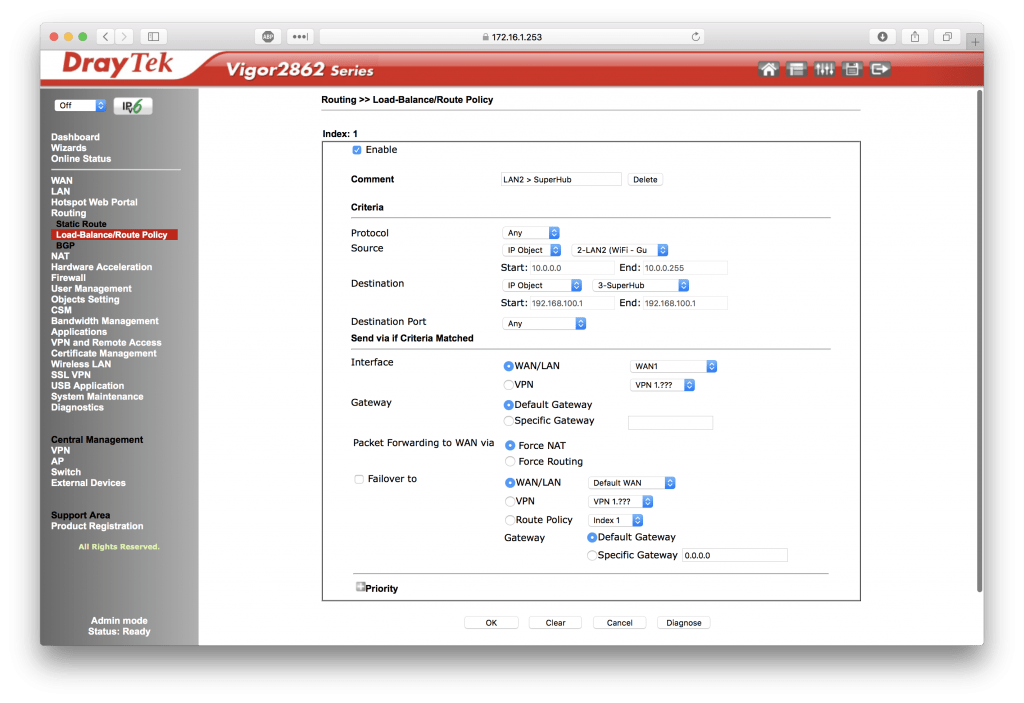
Click OK and then click OK again once the list of routing policies appears again.
Now, connect to the LAN you wish to restrict and try and access the router you’re blocking access too – the router’s webpage should now refuse to load (and any other traffic such as FTP, SSH, Telnet, DNS etc) will be blocked – this will not usually block internet access via this modem/router.