Category: Security

  • How To: Install ClamAV on CentOS 8.2

    How To: Install ClamAV on CentOS 8.2

    Installing ClamAV on CentOS 8.2 and configuring it to scan your server regularly is a pretty easy process. While there are better commercial virus scanners available with real-time scanning etc, ClamAV is completely free and is great for scanning your server on a regular basis for some peace of mind.

    In this guide I’ll walk through the process of installing ClamAV on CentOS, configuring regular scans and updates, and configuring email alerts so you can be made aware in the event of ClamAV finding a virus on your server. I’ll also make a guide soon with instructions on how to have ClamAV scan emails for Postfix.

    Installing ClamAV

    Before you can install ClamAV, you’ll need to add the EPEL repo to your server. You can do this by running the command below. You’ll need to trust the certificate on the first install too.

    sudo yum install epel-release && yum update

    Next, you’ll need to install ClamAV and other associated software:

    sudo yum install clamav-server clamav-data clamav-update clamav-filesystem clamav clamav-scanner-systemd clamav-devel clamav-lib clamav-server-systemd

    You’ll then be asked if you wish to download and install the packages listed above, just type y and press enter.

    # Is this ok [y/d/N]: y

    That’s it – ClamAV is now installed on your server. The next step is to install the latest definitions. You can do this by simply typing freshclam:

    sudo freshclam

    Configure ClamAV with SELinux

    Simply run the following command to register ClamAV with SELinux:

    setsebool -P antivirus_can_scan_system 1

    Now ClamAV is installed, you can configure cronjobs for scanning and updating definitions. Tip: Use clamdscan for quicker scans.

  • Ubuntu How To: Install ClamAV (Desktops and Servers)

    Ubuntu How To: Install ClamAV (Desktops and Servers)

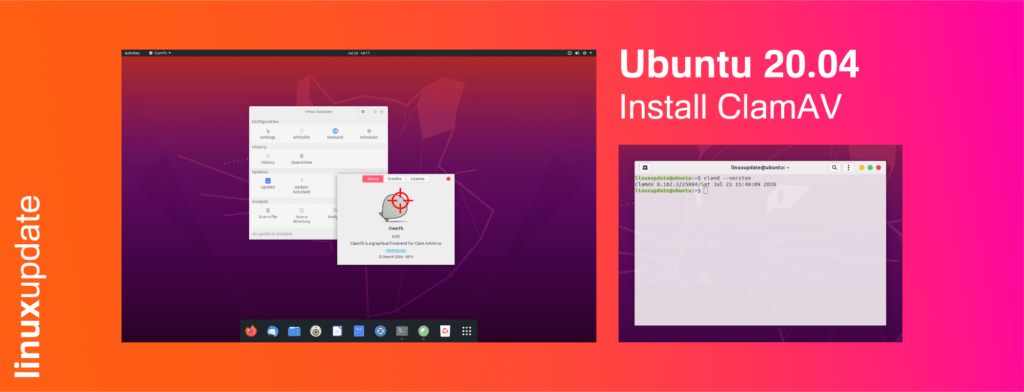
    ClamAV is a FOSS anti-virus product, and while it doesn’t offer features we’re all used to now such as real-time scanning we’ll walk you through the process of configuring a cronjob to scan on a regular basis. Premium AV is still our recommendation if you want advanced security, but ClamAV is sufficient for most use cases as base-line protection. In this guide we’ll be using a desktop install of Ubuntu, but headless server installs can use it too – just skip the step about the GUI.

    Install Updates

    First and foremost, run an update check on Ubuntu to see if there’s any updates and install them with:

    sudo apt update && sudo apt upgrade -y

    Install ClamAV

    Once you’ve installed updates, run the command below to install ClamAV:

    sudo apt install clamav clamav-daemon clamdscan

    We’re installing the 3 things below and running a definition update:

    1. ClamAV
    2. ClamAV’s daemon
    3. clamdscan, the daemon version of clamscan uses virus definitions heled in-memory by the ClamAV daemon resulting in much quicker scans.

    Install ClamAV Definition Updates + run your first scan

    Run a definition update with:

    sudo freshclam

    You’ll likely be given a warning about ClamAV being a version or two out of date, this is OK to ignore. When the ClamAV project releases updates, it takes time for the maintainers for your repo of choice to push the changes out. 

    linuxupdate@ubuntu:~$ sudo freshclam
    Sun Jul 26 13:58:55 2020 -> ClamAV update process started at Sun Jul 26 13:58:55 2020
    Sun Jul 26 13:58:55 2020 -> ^Your ClamAV installation is OUTDATED!
    Sun Jul 26 13:58:55 2020 -> ^Local version: 0.102.3 Recommended version: 0.102.4
    Sun Jul 26 13:58:55 2020 -> DON'T PANIC! Read https://www.clamav.net/documents/upgrading-clamav
    Sun Jul 26 13:58:55 2020 -> daily.cvd database is up to date (version: 25884, sigs: 3663341, f-level: 63, builder: raynman)
    Sun Jul 26 13:58:55 2020 -> main.cvd database is up to date (version: 59, sigs: 4564902, f-level: 60, builder: sigmgr)
    Sun Jul 26 13:58:55 2020 -> bytecode.cvd database is up to date (version: 331, sigs: 94, f-level: 63, builder: anvilleg)
    linuxupdate@ubuntu:~$

    Run your first scan with the command below.

    sudo clamdscan --fdpass --multiscan /

    A breakdown of this command:
    sudo: run as administrator
    clamdscan: the scanning utility
    –fdpass: passes the file descriptor permissions to clamd
    –multiscan: uses multiple threads
    /: sets the scan directory to / (root of the drive)

    Configure Auto-Scans and Auto-Definition Updates

    Once it’s all installed, we can edit the crontab file to schedule cronjobs for auto-scanning and auto-updates for ClamAV’s definition files. We’re going to use the root user’s crontab. Note: if you are using a desktop and want to use a GUI to schedule updates and scans, skip this step.

    Open crontab with:

    sudo crontab -e

    Note: on first run of crontab, you may be asked which text editor to use. We use /bin/nano.

    Add the following to your crontab file to run a definition update at 00:00 every day, and a scan at 00:05 every day:

    0 0 * * * /usr/bin/sudo /usr/bin/freshclam
    0 5 * * * /usr/bin/sudo /usr/bin/clamdscan --fdpass --multiscan /

    Save changes and exit.

    Install the ClamTk GUI (Optional)

    To install the GUI, run the command below:

    sudo apt install clamtk

    You can use the ClamTk GUI to schedule updates and scans with the Schedule option:

  • F-Secure SENSE Router Review: Hey Siri play ‘Complicated’ by Avril Lavigne

    F-Secure SENSE Router Review: Hey Siri play ‘Complicated’ by Avril Lavigne

    A few years ago the Finnish anti-virus company F-Secure released their SENSE router. The promise was that it can be a shield protecting your home from dodgy IoT devices and other security concerns. The problem? It’s not very good.

    The F-Secure SENSE is a security router with the aim of protecting your home network from dodgy IoT (Internet of Things) devices such as smart bulbs and smart fridges, the SENSE is a sleek glossy white plastic tower with an LED display that displays a clock and errors the SENSE might be encountering such as a lost internet connection. It features Wi-Fi, basic routing controls, and is controlled by an app. 

    Pricing

    Prices correct at time of writing. 

    The SENSE sells for £89 on its own, but requires a pricey F-Secure TOTAL subscription if you want any of the protection features. This puts the combined cost of the router and the cheapest 1 year subscription of F-Secure TOTAL (protecting 3 devices with anti-virus and every other device on your network with the router) at £164.99. For context, Bitdefender offer the Bitdefender BOX + 1 year subscription to their anti-virus for £129.99, protecting unlimited devices with installed anti-virus. Both F-Secure and Bitdefender have excellent reputations for providing best-in-class anti-virus solutions for Windows and macOS.

    Pricing: 3/5
    Competition is cheaper, but might not look as good.

    Wi-Fi

    Featuring Wi-Fi 5/ Wi-Fi AC1700, it offers reasonable speeds and a surprisingly good range of cover. Despite my phone dropping down a bar in the same room as the SENSE, it still had a strong connection in a part of the house that Wi-Fi previously dropped out in with a DrayTek VigorAP 902. If you set the SENSE up with an Android phone, you will have two SSIDs (e.g; ‘Cyberhatch Wi-Fi’ and ‘Cyberhatch Wi-Fi 5GHz’), and if you use an iOS device you can have either that or re-name the 5GHz network to make both SSIDs have the same name. There is a guest network feature too, so you can keep guests separate. 

    Pricing: 4/5
    Competition may have faster Wi-Fi, but strength in previous dead-spots is very good.

    Management

    As mentioned, the SENSE is controlled by the F-Secure SENSE Router app. The app is available for Android and iOS but the functionality between platforms is different despite the router having been available about 3 years before this review. I set the SENSE up initially on an Android phone but then moved over to my iPad to rename the 5GHz SSID to be the same as the 2.4GHz one, but to do that I had to factory reset the SENSE router and re-configure the entire network all over again. I moved the SSID and password over from the old network, but for those just use the default settings they will have to re-enter the new Wi-Fi password in on every device again. You cannot have multiple devices manage a SENSE router either, and there is no web based management interface. You cannot disable DHCP (but can define your own range + DNS servers), you cannot disable Wi-Fi. You can forward TCP and UDP traffic to internal devices, but you have to enter every port one-by-one with no support for port-ranges.

    [ngg src=”galleries” ids=”2″ display=”basic_imagebrowser” display_view=”default-view.php”]Pricing: 1/5
    Um, really?

    Network Protection

    All of the problems from above might be fine if the router offered protection to your devices. But, unfortunately, it doesn’t. Well, it does. It’s just not very good. F-Secure provide malicious site blocking and may block some known files if the URL is known to be offering infected files, but beyond that it offers very little browsing protection. The EICAR test files are not blocked if the .ZIP versions are downloaded, and I doubt it will block virus infected downloads or email attachments. It doesn’t block pop-up ads on adult/torrenting websites so malicious advertising and infected ads can still get through to your devices. It offers no content filtering/parental control. SENSE also blocked outbound SSH and RDP connections for me (but you can add IPs/hostnames to the allowed list), but F-Secure claim it monitors IoT devices to ensure they’re not misbehaving. This is its only redeeming feature in my eyes.

    My issue is that I could have spent £30-50 on Amazon for another router that offers essentially the same level of protection at no additional cost. The F-Secure TOTAL subscription that is required for the security features on the SENSE to work is a rip-off. £99 /year for 3 devices is unacceptable, but TOTAL does include F-Secure’s excellent Freedome VPN app. If you get it for free or discounted, it may be worth it if you can get a SENSE router for free. But otherwise this is not a product I could recommend to anybody. The extremely basic management options and feature-set is unacceptable when the competition offers far more for less money. I understand this device is aimed at consumers who don’t have much need for advanced features but the cheapest of the cheap competition offers it. The idea of a security router with content filtering is nothing new, but outside of the enterprise they rarely charge anything for the service (even DrayTek’s CSF pricing for the Vigor 3900 is £89.00 /year, and that’s an enterprise grade router intended for hundreds/thousands of concurrent users and offers granular levels of content filtering control).

    Network Protection: 1/5
    Why do I need a subscription for it to work when it doesn’t even do very much that other brand content filtering offers for free?


    Overall? Don’t bother. Get the Bitdefender BOX if you want protection, it can’t get any worse than this. Its target market is people who want Wi-Fi and security and don’t care about features, but it doesn’t even offer the security side of things very well. It’s overpriced, underfeatured, and massively disappointing. It looks good, but even that can’t save it. F-Secure have recently entered into a partnership with ZyXel to offer ZyXel routers and F-Secure protection (branded confusingly as F-Secure SENSE) with many more features that haven’t been back-ported so they have clearly moved on from their own-brand SENSE Router.

  • SSL How To | Exporting the Private Key and Certificate from a .pfx file

    SSL How To | Exporting the Private Key and Certificate from a .pfx file

    If you’ve exported an SSL certificate from a Windows PC via the Certificate Manager MMC plugin into a .pfx file, you may end up needing to spilt that file into its constituent parts (e.g; for moving the certificate to a Linux based server or if you’re importing it into Plesk). Thankfully doing this is very easy.

    While this tutorial is Windows orientated, all of the commands we’ll be using can be used on any OS (so long as OpenSSL is installed).

    (more…)

  • Let’s Encrypt are right: HTTPS does not mean a site can be trusted

    Let’s Encrypt are right: HTTPS does not mean a site can be trusted

    Preface: Let’s Encrypt is a project that aims to make SSL certificates free and easily available for anyone and everyone. Their aim is to create a more secure internet. Read all about them on their site here. Also for this article to make sense you’ll need to understand two of the types of certificates available. Domain Validation and Extended Validation. Domain Validation certificates merely make sure your connection to a website is encrypted. Extended Validation certificates are used by companies to prove to the user that you’re talking to a legitimate business as well as that your connection to the server is encrypted.

    Let’s Encrypt were recently in the news as a certificate issued by them was used by a malvertising website. Despite being made aware of this, they refused to revoke the cert. Most (if not all) other Certificate Authorities would revoke any certificate that’s used maliciously in order to prevent users being misled into thinking that they’re using a legitimate website because it uses HTTPS.

    (more…)